A Step-by-Step Guide to Installing Ponytail Extensions
Lots of people fall in love with ponytail extensions for a variety of reasons, including:
Versatility: There are many different ways to style ponytail extensions, from sleek and straight to curly and voluminous.
Length: Ponytail extensions can add length and thickness to produce a more voluminous ponytail for people with thinner or shorter hair.
Convenience: Ponytail extensions are a quick and simple solution for women who don't have the time or patience to grow and care for their hair every day as they know they can just use an extension every time they feel like having a longer hairstyle.
Fashion: Ponytail extensions are available in a range of colours, length and textures, enabling wearers to add a splash of color or develop a distinctive look that matches their outfits.
Here at LolaSilk we love ponytails extensions and that is why we created a step-by-step guide to teach you how to install ponytail extensionsat your home:
Step 1: Decide where do you want to have your ponytail –The position of the ponytail on your head can have a high impact on your final look. The first thing you need to decide is if you would place it lower or higher on your head. Pondos normally look amazing when put higher, almost at the top of your head while curly ponytails will look their best in a medium to lower positions. Straight ponytails, especially with longer lengths will look amazing in any position. See below examples of ponytails installations and the different looks that you can achieve with which one of them.


These 3 units are part of LolaSilk ponytail collection and you can see the entire portfolio here:
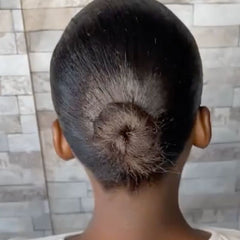
Step 2- Make a bun - now that you have decided where to place your ponytail it is time to prepare your natural hair so it can be ready for the ponytail installation. You may use the following procedures to style a perfect bun:
- Start by using a wide-tooth comb or your fingers to detangle your hair. Ensure that your hair is either dry or just slightly moist.
- Gather your hair together exactly where you are planning to have your ponytail extension installed. To keep it in position, use a hair elastic and make a normal ponytail with your natural hair.
- Twist your natural ponytail firmly until it wraps around itself, forming a bun.
- To keep the bun in place, use a few hairpins.

Step 3- Prepare all your baby hair – you can have a sleek all pulled to the back style bun, or you can also lay your edges the same way you do when you install a lace wig.
You can lay your edges by pulling your baby hair to the front and applying some water to keep them facing down towards your eyes. Use your fingertips to apply a little quantity of edge control product or mousse.
Using a brush or your fingertips, gently smooth the substance onto your edges in a downward direction. Brush your edges in the direction you want them to lie, using a tiny brush or a toothbrush.
Cover your edges with a scarf or headband and leave it to dry while you continue with the installation of your ponytail extension.
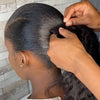
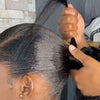
Step 4 - Installation. This is when you need to know which type of installation mechanism you have. Follow the steps below to install a wrap-around or a drawstring ponytail:
Wrap-around

1. Place the little comb attached to the ponytail extension at the top of your natural bun hooking it directly on your head.

2. Once the comb is firmly in position, wrap the ponytail extension around your natural ponytail and fasten it in place with the hair strap that is attached to it.

3. After the extension has been wrapped tightly around your natural ponytail, use bobby pins to hold the hair strap in place and hair spray to tuck any fly-aways.
Drawstring:
1. Insert your natural bun through the drawstring extension's center hole. Make sure the extension is centered on your natural ponytail.
2. Pull the drawstring firmly to make sure it has a good grip of your natural bun and that it won’t fall off with the movements of your head. Tuck the drawstring so it is not visible and you are ready to go.
Step 5- Styling – after installing your ponytail extension you could leave it just the way it is or you can decide to style it further and achieve a different look. For straight ponytails you could create a wavy or curly pattern or even transform it on a beautiful bun. For curly ponytail extensions you could decide to open up the curls even further to boost the volume of the hair.
Step 6- Accessorize – this step is completely optional. As soon as you are done installing and styling your ponytail extension, it is time to play around with hair tapes, bows or flower clippers. You might also want to wear a hairband or a scarf to add a little splash of colour and personality to your look.
If you want to see how quick and easy it is to install a ponytail extension don’t forget to check the installation of our human hair kinky straight 20inch ponytail here. If you want to see the full range of LolaSilk ponytail extensions options, click here.


Leave a comment (all fields required)